
The Art of Découpage in Sudan

Today, we will discuss renewing household items from furniture to pots or even paintings and antiques using an ancient art, the art of découpage. Découpage has recently arrived in Sudan, spread through training workshops and educational videos. It has become a source of income for many Sudanese women who apply these skills to beautify furniture, crockery and other household goods.
Découpage was known as the art of using old paper to make paintings. The first discovery of the art was seen in a cemetery in eastern Serbia, but it dates back to China in the 12th century, where paper pieces adorned lanterns, windows, boxes and others. In the 17th and 18th centuries, the art moved to France. The art of découpage was known as the art of the poor people because they did not have the monetary ability to renovate their furniture. Instead, they renewed their old pieces by sticking paper on and layering that with varnishes.
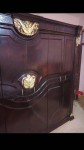
 The art of découpage is wonderful easy, made using simple at-hand materials. Using découpage, you can create beautiful paintings or revitalise an existing piece of furniture or furnishings, like chairs, vases, ceramic dishes, refrigerators, washing machines and others. Découpage can be applied to many different surfaces such as wood, cardboard, metal or pottery.
There are three ways to do découpage:
1) from scraps or fragments: in this method, you stick the scraps onto paintings or furniture/furnishings to create new designs or images;
2) montage: selecting and piecing together photos, stamps or adverts eg from newspapers to create a new piece of art which is then placed on wall murals or other frames and then sealed with varnish; and
3) collage: merging several pieces of any raw materials such as wood pieces, or shells or souvenirs in any specific, visually asthetic order as you see fit and then applying this to an object, eg to this might be a wooden box decorated with mother of pearl or precious stones and threads.
To do découpage, all that is needed are simple tools and raw materials. These are generally available in Sudan at reasonable prices in the larger bookshops and much is available online here at alsoug. You will need:
• a soft brush
• a sponge, ideally an old one, to be used to help stick the decoupage paper down using the glue
• acrylic paints and acrylic medium (Gesso)
• découpage glue or plain white glue
• Normal colourless varnish
• Coloured tissue paper, pictures from magazines or photos printed using laser, but they must be very thin
• Small, sharp scissors like nail scissors or sewing scissors
• Smooth sandpaper to smooth the surface where the paper and other cuttings will be placed
• An object or surface to work on whether pottery, wood, plastic or glass
Now follow these steps to create your work of art:
(a) If you want to apply découpage to a wooden surface, start by preparing the wood using the sandpaper. If the object/frame you want to beautify (the base surface) is not wood, skip to Step (b). If using wood, make sure you sandpaper it until it is smooth to the touch.
(b) Apply a layer of one of the following to the base surface:
(i) use Gesso Acrylic Medium if you want to keep the natural colour of the base surface;
(ii) whitewash emulsion if you want a white background; or
(iii) an acrylic paint mixed with a bit of baby powder, glue and white paint. The ensuing material is called Sondos. I have named it Sondos because the person who introduced it to us is a Sudanese artist named Sondos Siddiq. Sondos is in an expert in découpage and loves helping others discover this artform.
(c) Whilst the acrylic medium, emulsion or paint you used in Step (b) above is drying, you should trim the edges of the tissue or pictures you are using to start creating the overall image you want. A good way to minimise error later is to do a trial layout of the pieces on the base surface and maybe take a photo of the result so you know where to re-apply the pieces.
(d) Once the acrylic medium, emulsion or paint you used in Step (b) above is dry, apply a layer of the découpage glue to the base surface, place the pieces on top in the layout you want, then apply another layer of the glue. Use the old sponge to wipe away any excess glue.
(e) Once the glue has dried, apply a layer of varnish to seal the deal.
We hope this article has been helpful in showing you how to easily do découpage in Sudan. If you want to see how the experts do it, click here to check out the beautiful works of art that have been made by local Sudanese découpage experts. And if your works turn out well, consider posting an ad for them on alsoug.com (click here to post an ad or download our app here).
We'd also love to hear about your experience, so do share your comments below.
Have fun decoupag-ing :)
alsoug.com
- MyCashi App
About Cashi
GetCashi.com is a secure digital wallet for Sudan—offering fast money transfers, bill payments, and merchant solutions. Simple, reliable, and built for everyday needs.


Comments
Please login or register to comment
Login/Registration